

At a glance:
- Always check tyre pressure before every ride for stable handling and control.
- Inspect tread depth, sidewalls and surface for cuts, punctures and damage in ATV tyres.
- Examine wheels, rims and valve stems for structural integrity and air retention.
- A consistent pre-ride tyre checklist keeps every ride safe and trail-ready.
Tyre failure is one of the most common causes of mid-ride breakdowns on Australian trails and most of it is preventable.
Australia’s diverse riding conditions, from muddy tracks and rocky terrain to sandy dunes and rugged farmland, place serious strain on ATV tyres. Yet tyre checks remain one of the most overlooked parts of pre-ride preparation. Many riders often only notice an issue once performance or safety has already been compromised.
A quick ATV tyre inspection before you head out takes five minutes and makes all the difference. From inspecting tread depth and tyre pressure to spotting sidewall cracks and embedded debris, a quick routine check can help identify problems early and reduce the risk of costly damage.
In this blog, we walk you through the essential ATV tyre inspection techniques every enthusiast should follow to avoid unexpected breakdowns.
Why Pre-Ride ATV Tyre Inspections Matter
A thorough pre-ride tyre inspection is the foundation of safe and reliable riding. The following points highlight why a routine check directly impacts your performance and safety on the trail:
- Reduces Risk of Losing Control: Worn or underinflated tyres struggle to grip uneven ground, leading to unstable handling and unpredictable steering. On rough or technical terrain, that loss of control can escalate quickly, particularly at speed or on a side slope.
- Avoids Punctures and Blowouts: Small cuts or embedded stones might look harmless until an off-road impact turns minor damage into a full-blown blowout. Checking for damage and correct pressure before a ride reduces the risk of dangerous tyre failures or unexpected interruptions during a ride.
- Maintains Braking Performance and Traction: Even slightly worn treads can lower braking efficiency on tough surfaces like mud, sand and rocky tracks. Ensuring proper tyre contact with the ground provides your ATV with effective stopping power and grip. Regular inspection keeps your tread in the right condition to perform well across all types of terrain.
- Minimises Costly Damage and Breakdowns: Riding on rough trails accelerates tyre wear faster than many riders expect. Neglecting inspection can lead to premature tread deterioration, rim damage and mid-ride breakdowns in remote locations. Identifying early warning signs such as uneven wear, punctures, sidewall cuts and low tyre pressure helps you avoid expensive repairs and unplanned downtime.
What to Include in Your ATV Tyre Pre-Ride Checklist?
Even a few minutes of inspection can make a noticeable difference in ride safety and tyre performance. Below are some essential ATV tyre checks every rider should complete before hitting the trail:
Start With Tyre Pressure Checks
Maintaining the correct tyre pressure is essential for stable handling, traction and control across terrains such as sandy dunes, muddy tracks and rocky trails and tyre longevity.
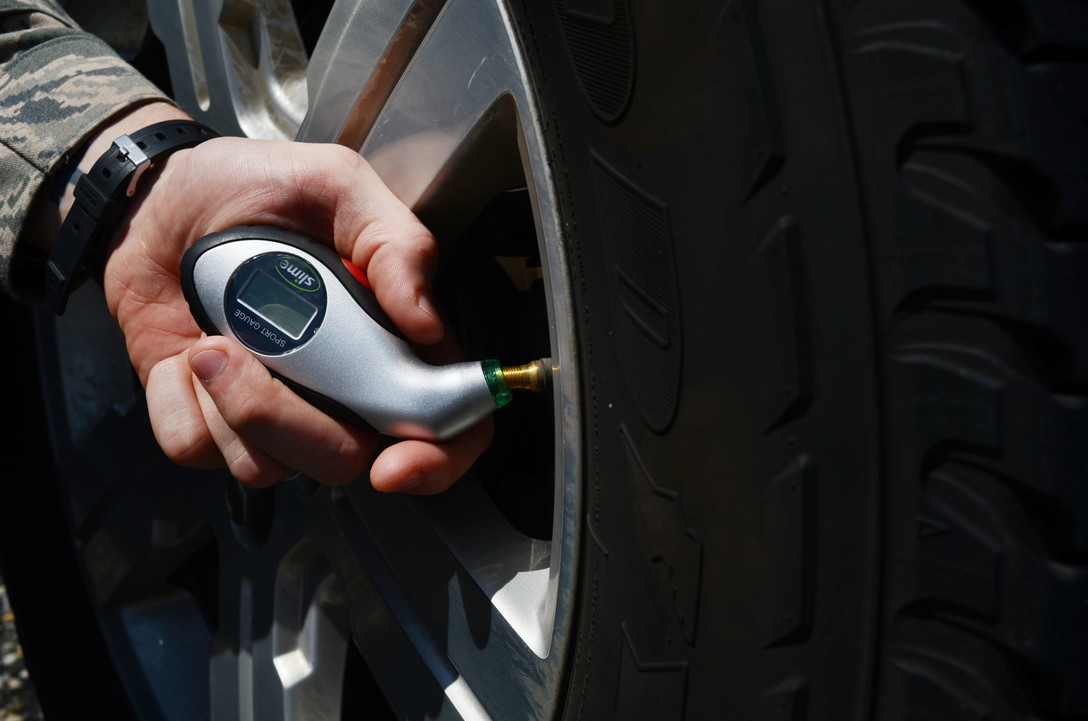
Checking your ATV tyre pressure is simple when you use the right tools and follow a simple process. Use a reliable low-pressure gauge designed specifically for ATV tyres.
To check the tyre pressure,
- Carefully remove the valve cap from the tyre and firmly attach the pressure gauge to the valve stem.
- The gauge will promptly display the current tyre pressure.
- If the pressure is above or below the recommended level, inflate or deflate the tyre until it reaches the manufacturer’s specified pressure.
Most ATV tyres in Australia typically run between 4 and 8 PSI, depending on the terrain, tyre type, load and ATV model. Always follow the manufacturer’s recommended PSI for safe and reliable performance.
Read more: How To Select The Ideal ATV Tyres For Muddy Terrain
Tyre Tread Depth Inspection
Tyre tread depth inspection is a crucial pre-ride checklist for ATV riders, as tread pattern matters and directly impacts safety and performance during off-road adventures.
Adequate tread depth is crucial for maintaining traction on various terrains. It allows the tyres to grip the ground effectively, preventing slipping and sliding, especially in challenging conditions like mud or loose gravel.
Insufficient tread depth causes the ATV to skid or lose balance on uneven or slippery terrain. This instability increases the risk of accidents, particularly in remote areas.
Proper tyre tread depth ensures efficient braking and responsive handling. Worn-down treads can lead to longer stopping distances and reduced manoeuvrability.
Here’s how you can check tread depth:
- You will need a tread depth gauge, a specialised tool to check your ATV tyre’s tread depth.
- Then, you have to identify the main tread groove on the tyre. This is the area where you’ll measure the depth.
- Place the probe of the tread depth gauge into the groove until it makes contact with the base of the groove.
- The gauge will display the tread depth in millimetres or inches.
- Compare this measurement against the manufacturer’s recommendations and applicable safety requirements.
Tip: You can repeat the measurement at various points across the tyre to check for even wear.
Check For Cuts, Punctures and External Damage
When inspecting ATV tyres, carefully examine the entire surface for cuts, gashes or abrasions. These can occur from sharp rocks, sticks or other debris encountered during off-road rides. Even minor cuts can compromise the tyre’s structure and lead to slow leaks or sudden blowouts if left unattended. It’s crucial to address any cuts promptly by repairing or replacing the damaged ATV tyre with a new one.
Similarly, look for embedded objects such as nails, screws or thorns. These may not cause immediate pressure loss but will work deeper with each ride, eventually causing a slow leak or sudden puncture at the worst possible moment.
Examine the tyres’ sidewalls for bulges, cracks or tears. Sidewall issues can result from impacts with sharp objects or hitting obstacles on the trail. A bulging sidewall should be considered a replacement item, not a repair.
Quick Question: Repair or Replace?
- Small tread-area puncture (under 6mm, no structural damage): can typically be plug-repaired and monitored.
- Sidewall puncture, cut or bulge: replace. Sidewall repairs are not structurally reliable for off-road use.
- Tread worn below 1.5mm: replace (legal minimum in Australia).
- Age cracking visible on sidewalls: inspect carefully; replace if cracking is deep.
When in doubt, the Oceanic Direct team can help you assess whether a tyre is worth repairing or due for replacement.
Inspect Wheels And Rims For Structural Damage
Tyres often get all the attention, but the condition of your wheels and rims plays an equally important role in ride safety and pressure retention. A bent or cracked rim prevents the tyre from seating correctly against the bead, causing gradual air loss, uneven wear and noticeable handling problems.
Run your hands along each rim edge and visually inspect for dents, cracks or visible deformation especially after rides on rocky trails or rough bush terrain. Pay attention to small signs like slow pressure loss between rides, an uneven tyre fit or visible warping on the rim edge. These signs may indicate that rim damage is affecting your tyre’s strength and should be fixed before your next ride.
Examine the Condition of Valve Stems and Air Retention System
Valve stems are small, but a failing one can drain your tyre pressure silently between rides. These air leaks that are easy to miss until tyre pressure has already dropped to an unsafe level.
During your pre-ride check, press gently on each valve stem and look for signs of wear, brittleness or looseness at the base.
Key things to watch for during valve stem inspection:
- Missing or loose valve caps expose the valve core to dirt, moisture and debris.
- Rubber valve stems on older ATVs harden and crack over time, requiring periodic replacement.
- Consistent pressure drops between rides with no visible tyre damage often point to a faulty valve stem.
- Apply soapy water around each valve stem and watch for fine bubbling to detect slow leaks not visible to the naked eye.
A reliable pre-ride ATV tyre inspection does not need to take long, but its impact on your safety and performance is significant. Checking tyre pressure, inspecting tread depth, examining rims and verifying valve stem condition are small steps that make a real difference in how your ATV handles and performs on the trail.
Riding across Australia’s demanding trails, whether through muddy tracks, rocky terrain or sandy dunes, puts real pressure on your tyres every single time. Making this checklist a non-negotiable habit before every ride is what separates a confident rider from an unprepared one. Check your tyres, trust your checklist and ride with confidence.
Start every ride on the right tyres. A solid pre-ride checklist is only as good as the tyres beneath you. Oceanic Direct, your trusted ATV tyre partner across Australia, offers a dependable range of ATV and quad bike tyres built for performance and durability on any terrain.
Get in touch with us and find your perfect ATV tyre match today.
FAQs
How long do ATV tyres typically last on Australian terrain?
ATV tyres typically last 3 to 5 years, depending on terrain, riding frequency and maintenance habits. However, Australia’s tough conditions can accelerate tyre wear significantly faster than standard estimates suggest.
What is the recommended tread depth for ATV tyres in Australia?
The legal minimum tread depth in Australia is 1.5mm. However, for off-road performance and safety, most experienced riders treat anything below 3mm as a practical replacement point, especially in terrains like wet mud or loose gravel.
How frequently should ATV tyres be checked for damage?
Inspect ATV tyres before and after every ride. A quick pre-ride check helps identify existing damage, while a post-ride inspection catches any cuts, punctures or debris picked up during the ride before they develop into bigger issues.
How can you extend the lifespan of your ATV tyres?
Proper maintenance and consistent riding habits go a long way in maximising your ATV tyre lifespan. Here are the key tips:
- Check tyre pressure before every ride (cold) and adjust for terrain type
- Rotate tyres periodically for even tread wear.
- Clean tyres after every ride to remove mud and debris.
- Avoid overloading beyond the recommended weight capacity.
- Store your ATV away from direct sunlight and heat.
- Use terrain-appropriate tyres to reduce unnecessary wear.
What are the most trusted ATV tyre brands available in Australia?
Some of the trusted ATV tyre brands in Australia include Maxxis, Kenda, Carlisle, Wanda (Journey), Duro and Bushmate. You can find and purchase all of these high-quality tyres from Oceanic Direct.
Related Stories

Pro Tips For Selecting The Best Tyre For Your ATV In Australia
At a glance: Choose ATV tyres based on your main terrain and riding conditions in Australia. Confirm the correct ATV tyre size and fitment to maintain safe handling and ensure proper ground clearance. Match tread ...
How to Maintain Correct Tyre Pressure for ATV, Quad & Dirt Bike Tyres
At a glance: Most ATV tyres run best at 4-8 PSI for safe handling, traction, and tyre life. Check PSI cold with a low-range gauge and keep pressure within the manufacturer’s limits. Adjust PSI slightly ...
Related Posts

ATV Or Quad Bike Tyres – Is There A Difference?
If you are into off-road travelling, ATV and Quad bikes might be a familiar term for you. Maybe you use this word quite often and sometimes interchangeably. But is it technically correct when you use ...